Classic Apple Pie

Somehow, it always comes down to apple pie for me. I can’t seem to get away from the apple peeling, no matter how hard I try. Any time I ask my husband what kind of dessert he wants me to make, “apple pie” seems to be the answer. Whether it’s just for us to enjoy or to please whatever crowd we find ourselves in. It is. Always. Apple. Pie.
What I love about this apple pie recipe is its simplicity. It's designed to be perfect for beginners, with straightforward steps and no need for special equipment. While crust can be intimidating, this one is relatively easy and comes out golden and flaky every time. I promise… You can do it!
If you're searching for a dependable apple pie recipe, this one is it. It’s your grandma’s apple pie… The one you look forward to every holiday. Only this time, it’s going to be YOU with the dough on your hands and the apple peels in your trash can. There is no better place to start your baking journey than with the most popular dessert out there.
Classics are hard to beat, and this one will be around for the foreseeable future. I’m not going to be escaping the apple peeling any time soon.
With love,
Your Baker, Hannah
Convinced it’s time for some homemade Apple Pie? Here’s a grocery list of everything you’re gonna need!
Ingredients Needed for Apple Pie:
AP flour
Vegetable shortening
Ice water
Salt
Melted butter
Granulated sugar
Honeycrisp apples
Granny Smith apples
Flour
Cinnamon
(To make it even easier, you can hit the “Get Ingredients” button inside the recipe, and these items will be added straight to your shopping cart at the grocery store of your choice.)
Ingredient Substitutions:
If you're missing any ingredients, here are some suitable substitutes you can use:
AP Flour: You can use pastry flour for a slightly more tender crust or whole wheat flour for a heartier flavor.
Vegetable Shortening: Butter or margarine can be used instead, but keep in mind that this may alter the texture slightly.
Granulated Sugar: Brown sugar can add a deeper flavor to the filling, or you could use coconut sugar for a more natural sweetener.
Cinnamon: Nutmeg or allspice can provide a different spice profile if you want to mix it up.
What Tools Do You Need to Bake a Homemade Apple Pie?
Click the links below to shop for any kitchen tools you may be missing from your collection!
(These links are affiliate links, and if you decide to make a purchase, I will be granted a small commission at no extra cost to you. I’ll always be thankful for your support!)


Step-By-Step Summary for Baking a
Homemade Apple Pie:
To begin making your Classic Apple Pie, first prepare the crust. In a large mixing bowl, combine flour and salt. Cut the vegetable shortening into the flour using your hands until the mixture resembles coarse crumbs.


Gradually add ice water, mixing gently until the dough comes together. Divide the dough in half, roll out each ball to fit your pie pan, and set aside.


Next, make the apple filling by peeling and slicing the Honeycrisp and Granny Smith apples. Cook the apple slices in a pot over medium heat until they are slightly softened, then remove them from heat. Add sugar, flour, and cinnamon to the warm apples and stir until combined.
Assemble the pie by placing the bottom crust into the pie pan, adding the apple filling, and topping it with the rolled-out dough or lattice strips.


Lastly, trim the excess dough from your crust, roll it under, and crimp it tightly. Top with melted butter and sugar, and cut vent holes into the crust. Bake until the crust is golden brown and the filling is bubbling. Allow the pie to cool before serving to let the filling set.


FAQs About Baking Homemade Pies
1. How do I know when my pie is done?
Look for a golden-brown crust and bubbling filling. You can also check the internal temperature; it should reach around 200°F.
2. How long can I store a baked pie?
Baked pies can be stored at room temperature for 2 days or in the refrigerator for up to a week.
Tips for Achieving the Perfect, Flaky Crust
Use cold ingredients: Ensure your shortening and water are very cold to help create a flaky texture.
Don't overwork the dough: Mix just until combined; some lumps of shortening are fine.
Rest the dough: Allow the dough to chill in the fridge for 30 minutes before rolling out.
How to Prevent Your Pie from Leaking and Getting Soggy
Use a thickening agent: Flour or cornstarch in the filling helps absorb excess moisture.
Pre-bake the crust: Blind baking your crust before adding the filling can help create a barrier and prevent sogginess.
Vent your pie: Make sure to cut slits in the top crust to allow steam to escape.
How to Freeze Your Pie Before Baking to Serve Later
Prepare your pie as usual, but don’t bake it.
Wrap the pie tightly in plastic wrap and then foil to prevent freezer burn.
When ready to bake, remove the wrapping and bake from frozen, adding extra time as needed.
With these tips and steps, you’ll have a delicious Classic Apple Pie that's sure to impress family and friends. Enjoy the process of baking and, most importantly, savor every slice!
Recipe for Classic Apple Pie:

Classic Apple Pie
Ingredients
Instructions
- In a large mixing bowl, place flour and salt. Mix until combined
- Add shortening, and using your hands, cut shortening into the flour. (Use your fingers to rub through the flour and shortening, combining it until it becomes a sandy-textured mixture with small pea-sized lumps of shortening throughout. You do not want to over mix, and want to make sure there are still some lumps of shortening to make the crust flaky and tender).
- Once the flour and shortening are combined, begin adding water 1-2 Tablespoons at a time. You DO NOT want to add all of the water at once. You only want to add as much water as it takes to get the dough to begin forming into a ball that will hold together when rolled out. I would recommend using your hands to mix in the water so you can feel the texture of the dough as you go, making sure not to over saturate it. (The dough should feel slightly less pliable than play-dough)
- Divide your dough into to equal balls. Take the first ball of dough, and roll it out to 1/4 inch thickness on a well floured surface. Fold the dough in half, pick it up, and gently place it in the bottom of your pie pan, making sure not to rip the dough. (If there are holes or rips in your dough, do your best to patch them before adding your filling)
- Once the bottom crust has been placed in the pan, take your second ball of dough and repeat the rolling process. Once it has been rolled, you can either fold it in half and set it aside, or you can cut it into 7 equal-width strips for a lattice top, and set them aside. Proceed to making your filling.
- Peel and core all apples, and slice into 1/2 in thick slices.
- Place the apple slices into a large pot. Cook the apples on the stove top over medium heat just until the apples have gotten warm and are beginning to cook down slightly. You do not want to overcook them. You just want them to slightly begin to soften.
- Remove the apples from the heat.
- Into the pot of warm apples, add your sugar, flour, and cinnamon. Stire until well combined.
- Set the filling aside to continue assembling your pie.
- Pre-Heat your oven to 375 degrees F. Grab your pie pan with the bottom pie crust in it.
- Place your filling into the bottom crust of your pie. Smooth out the filling so it is an even height all across the surface of the pie.
- If you are NOT doing a lattice top, take the second half of your rolled out dough (the top pie crust) and place it over the filling, making sure to cover the entire surface of the filling. If you are doing a lattice top, see the next step.
- For a lattice top, take 4 strips of your top crust, and space them evenly across the surface of your pie in 4 parallel lines. Fold back every other strip.
- Lay the fifth strip of dough perpendicular to the parallel lines you folded back, intersecting them. Unfold the folded strips over the top of the perpendicular strip.
- Fold back the parallel strips that you had previously left unfolded. (They should fold backwards over the perpendicular strip)
- Lay another perpendicular strip over the parallel strips, and once again unfold the parallel strips that had been folded back. Repeat this process with the last strip of dough.
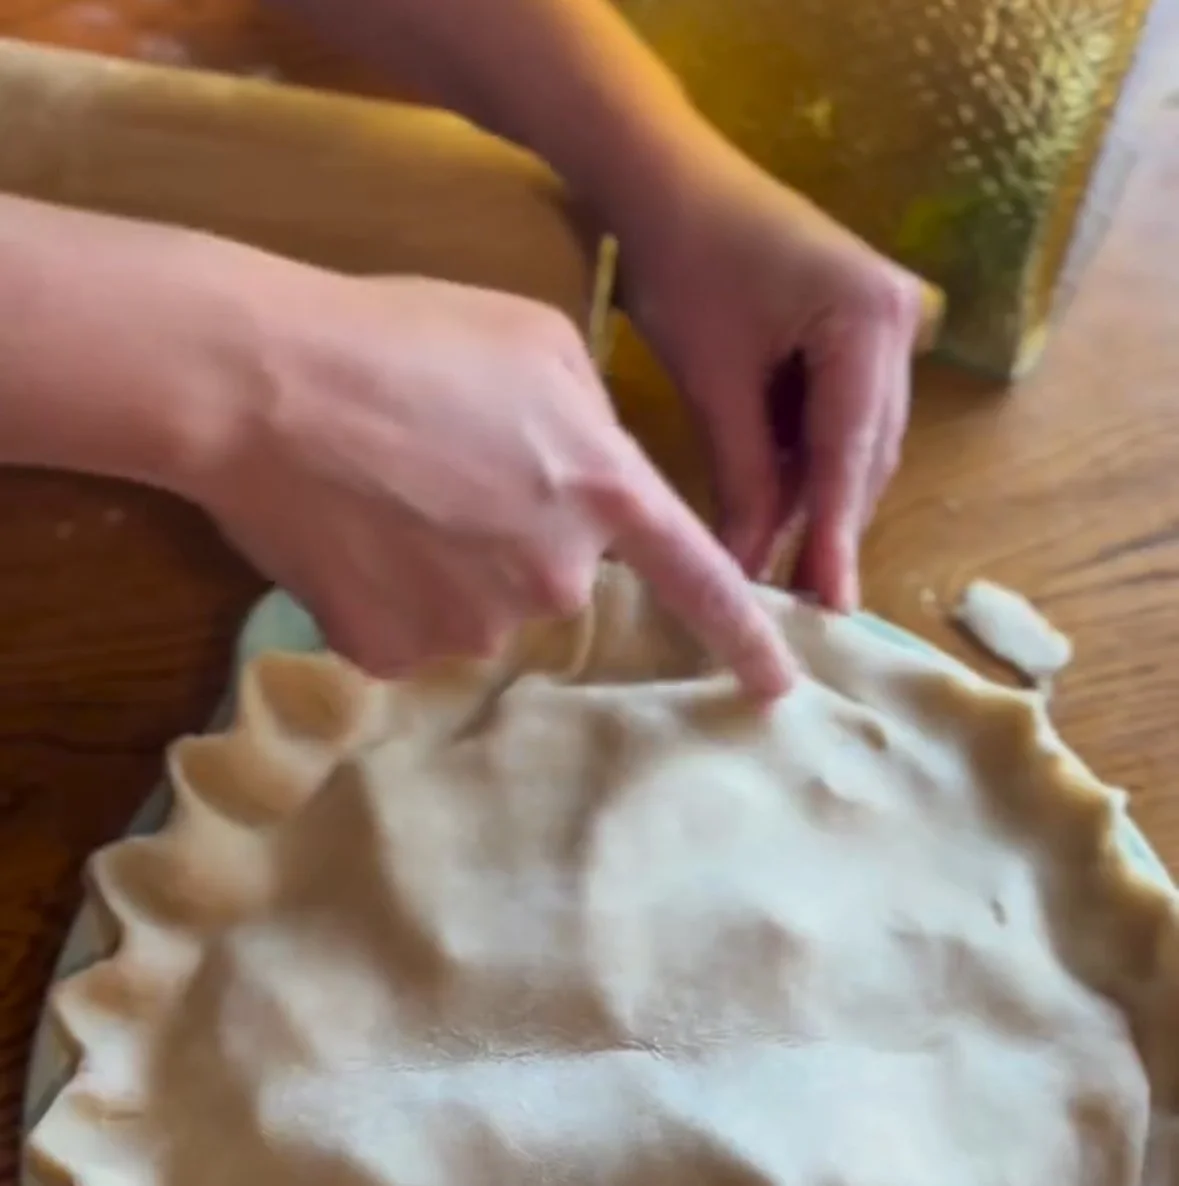
- Once the top of the pie has been placed or latticed, using a sharp knife, trim the excess pie dough that is hanging over the edge of the pie pan, leaving 1 inch of excess.
- Once trimmed, tuck the excess dough under itself, forming a ridge around the edge of the pie pan.
- Using your fingers to pinch, or a fork to crimp, flute the edges of your pie dough, sealing the top and bottom crust together with the filling in the center.
- If you have a solid pie crust top (not latticed), using a sharp knife, cut 5-10 small slits in the top of the pie crust to allow it to vent. (You do not have to do this if you made a lattice top)
- Brush the top pie crust with melted butter until it is thinly coated, and sprinkle lightly with sugar.
- Place the pie into your pre-heated oven and bake for 45 minutes to 1 hour, or until the crust is perfectly golden, and the filling is bubbling throughout.
- Remove from the oven and allow to cool for 30 minutes to 1 hour to allow the filling to set. Slice, serve, and enjoy!


